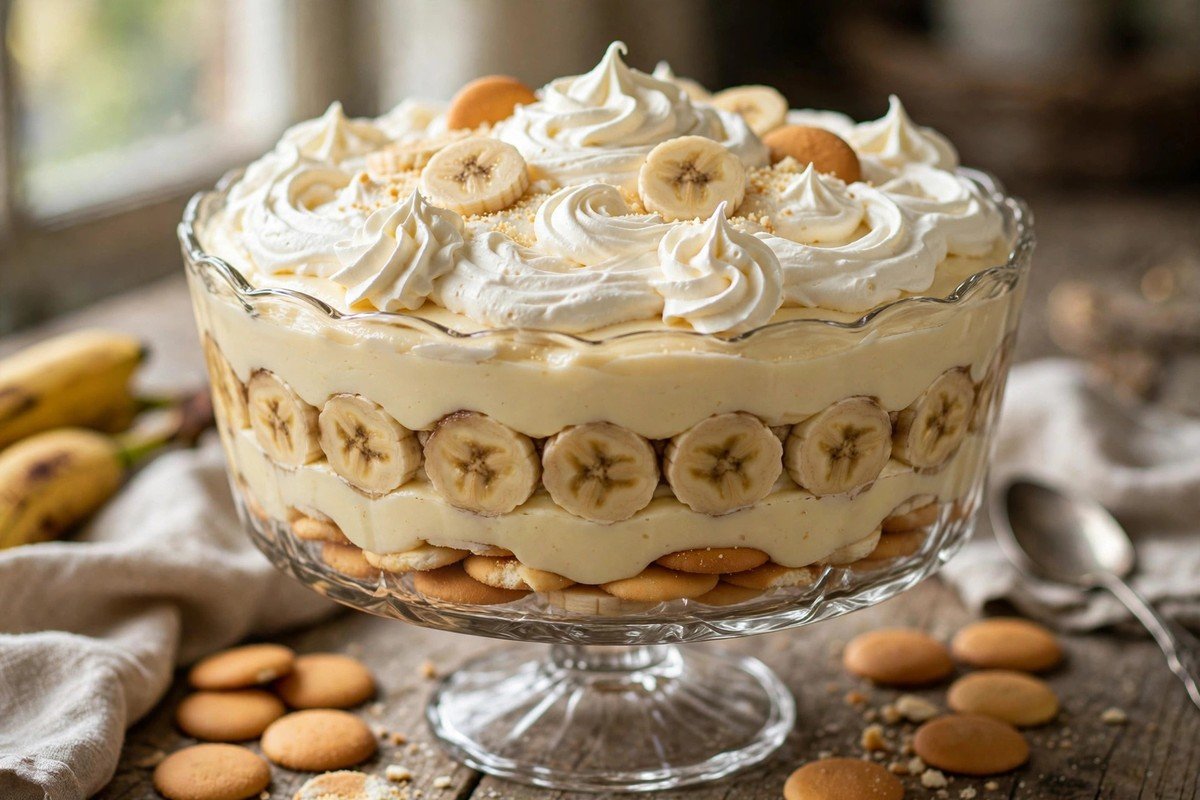
Banana pudding is one of those desserts that never goes out of style. Layers of creamy vanilla pudding, sliced bananas, and soft vanilla wafers come together in the most comforting way. It is sweet, simple, and always the first bowl to disappear at a gathering.
Ingredients
- 3/4 cup granulated sugar
- 1/3 cup all-purpose flour
- 1/4 teaspoon salt
- 3 cups whole milk
- 4 large egg yolks, lightly beaten
- 2 tablespoons butter
- 2 teaspoons vanilla extract
- 4 to 5 ripe bananas, sliced into rounds
- 1 box (11 ounces) vanilla wafer cookies
- 2 cups heavy whipping cream
- 3 tablespoons powdered sugar
- 1 teaspoon vanilla extract (for the whipped cream)
Steps
1. Mix the dry ingredients
In a medium saucepan, whisk together the granulated sugar, flour, and salt. Make sure there are no lumps of flour hiding in there. This dry mix is the base of the pudding, and getting it smooth now means a silky pudding later. Set the saucepan on the stove but do not turn on the heat yet.
2. Add the milk and egg yolks
Pour the milk into the saucepan and whisk it into the dry ingredients until completely smooth. In a small bowl, lightly beat the egg yolks. Add a few spoonfuls of the milk mixture to the yolks and stir, which gently warms them so they do not scramble. Then pour the warmed yolks back into the saucepan and whisk everything together.
3. Cook the pudding
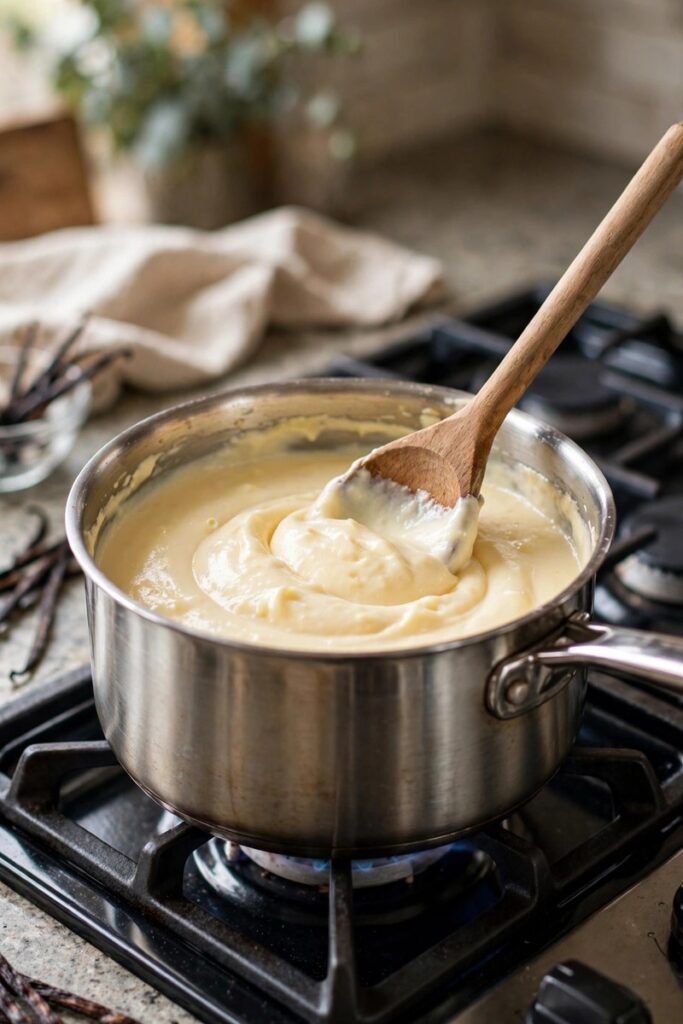
Turn the heat to medium and cook the mixture, stirring constantly with a wooden spoon or whisk. Do not walk away during this step. After 8 to 10 minutes it will start to bubble gently and thicken noticeably. Keep stirring for 2 more minutes until it is thick enough to coat the back of a spoon. Take it off the heat right away so it does not overcook.
4. Finish the pudding
Stir the butter and vanilla extract into the hot pudding until the butter melts completely. The pudding will look glossy and smell wonderful. Press a piece of plastic wrap directly onto the surface of the pudding to stop a skin from forming. Let it cool for about 20 minutes at room temperature. It will thicken more as it cools.
5. Whip the cream
While the pudding cools, pour the heavy cream into a large cold bowl. Add the powdered sugar and vanilla extract. Beat with a hand mixer or stand mixer on medium-high speed until soft peaks form, which takes about 3 minutes. The cream should hold its shape but still look smooth and pillowy. Do not overbeat or it will turn grainy.
6. Start layering
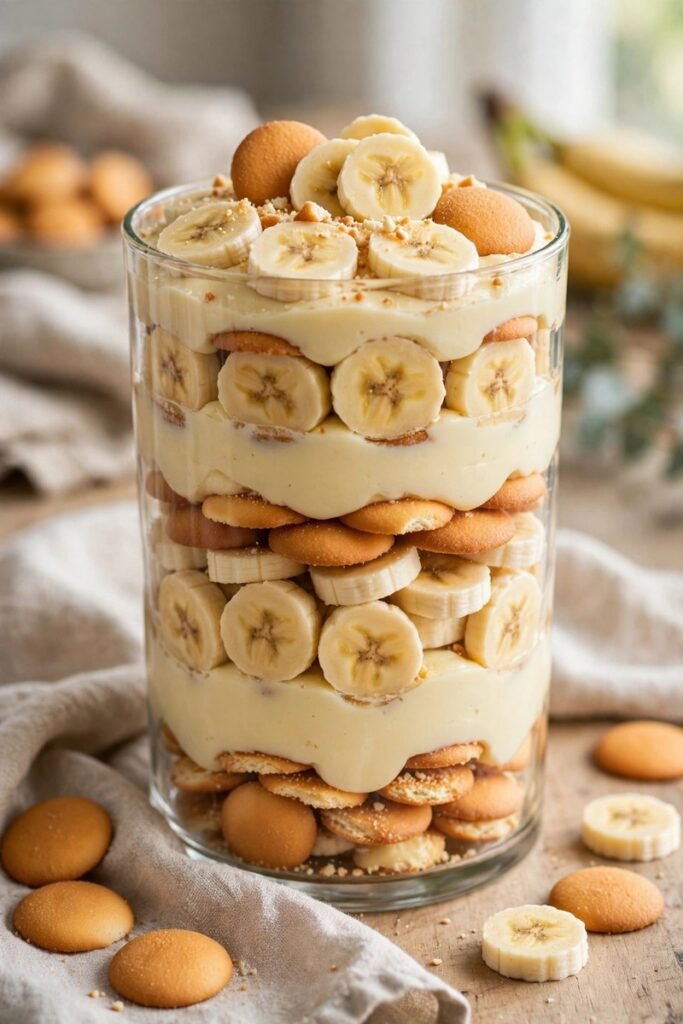
In a large glass bowl or trifle dish, spread a thin layer of pudding on the bottom. Add a single layer of vanilla wafers, then a layer of banana slices. Spoon about a third of the remaining pudding over the bananas and spread it gently. Repeat the wafer, banana, and pudding layers two more times, ending with pudding on top.
7. Top with whipped cream
Spread the whipped cream over the top layer of pudding, making soft swirls with the back of a spoon. Crush a few extra vanilla wafers and sprinkle the crumbs over the whipped cream for a pretty finish. It does not have to look perfect. Homemade is supposed to look homemade.
8. Chill before serving
Cover the dish with plastic wrap and refrigerate for at least 4 hours, or overnight if you can wait. The chilling time is important because it lets the wafers soften into cake-like layers and the flavors blend together. Serve cold, scooping deep so everyone gets all the layers in each serving.
Tips
Use bananas that are ripe with a few brown spots for the sweetest flavor, but not mushy. To keep the banana slices from browning, you can toss them very lightly with a teaspoon of lemon juice before layering. This pudding keeps in the fridge for up to 3 days.
Conclusion
I hope this banana pudding brings back sweet memories or helps you make new ones. It is creamy, nostalgic, and so easy to put together. Bring it to your next get-together and watch it vanish.