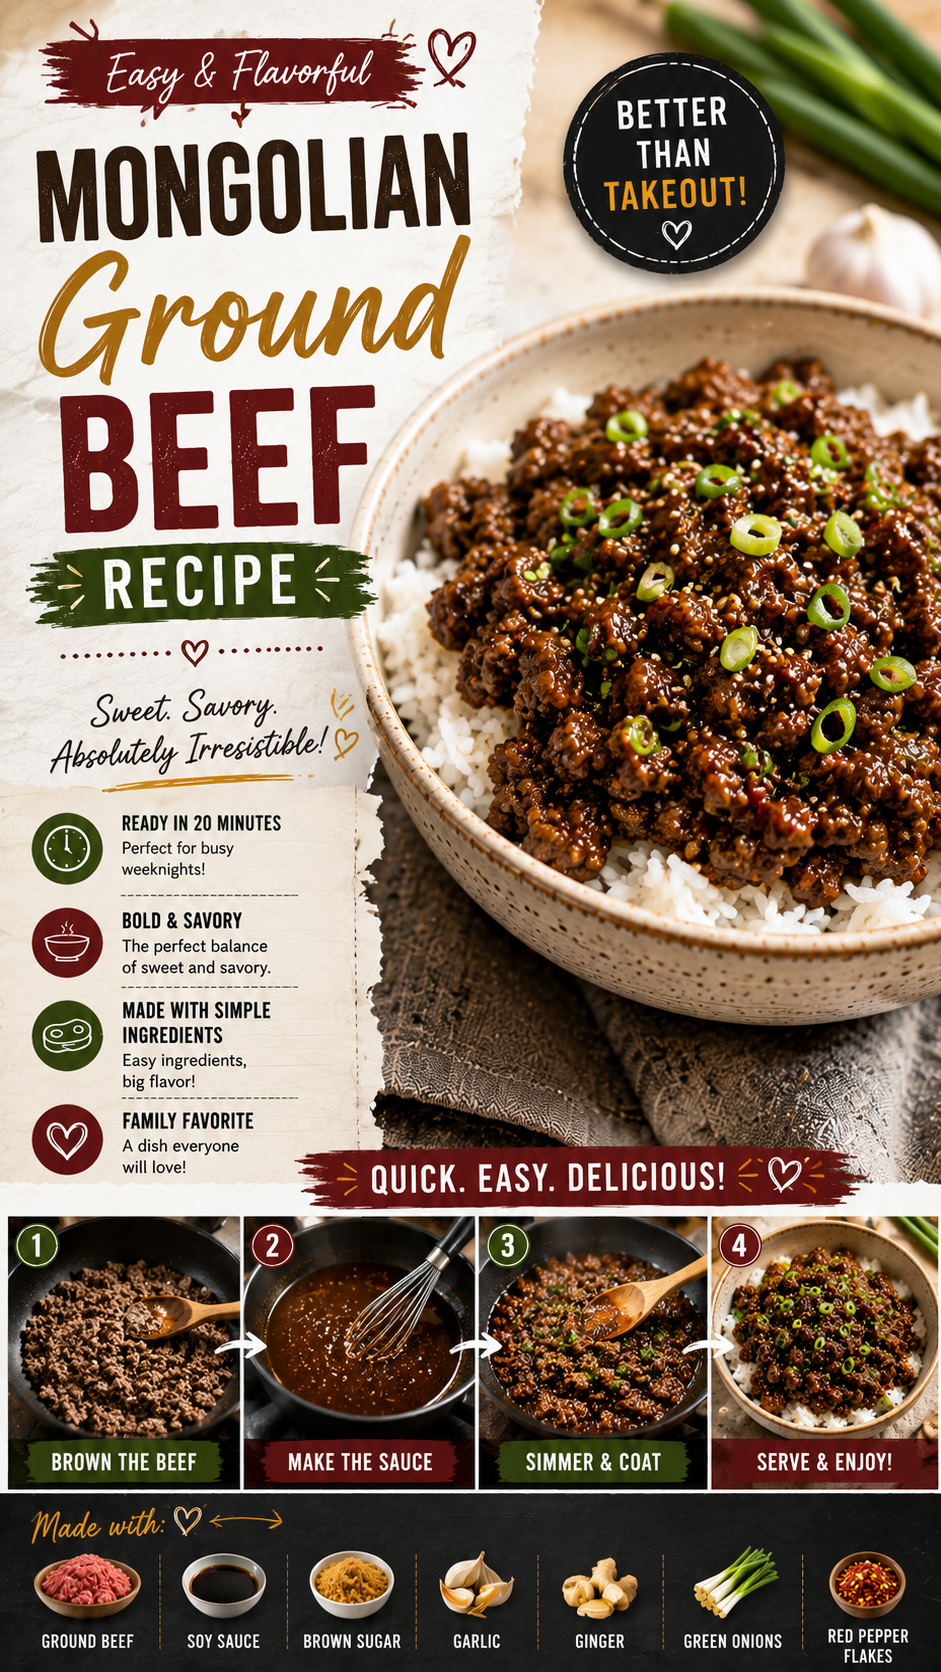
I love Mongolian beef from takeout, but I do not love deep frying at home.
This version skips that whole process and uses ground beef instead of sliced steak, which means dinner is ready in about 20 minutes with almost no cleanup.
It’s sweet, savory, and just as satisfying as the restaurant version, without the mess.
Why This Recipe Works
Ground beef browns quickly and soaks up the sauce evenly, so you get all that classic Mongolian beef flavor in every single bite instead of just on the surface.
The sauce comes together from pantry staples you probably already have, soy sauce, brown sugar, garlic, and ginger, simmered just long enough to thicken into something glossy and rich. 🥢
Finishing with a cornstarch slurry is what gives the sauce its signature glossy, clingy texture, so it coats the beef instead of pooling at the bottom of the pan.
What You’ll Need
| Ingredient | Amount |
|---|---|
| Ground beef | 1 lb |
| Garlic, minced | 3 cloves |
| Fresh ginger, grated | 1 tbsp |
| Soy sauce | 1/3 cup |
| Brown sugar | 1/3 cup |
| Beef broth | 1/4 cup |
| Rice vinegar | 1 tbsp |
| Cornstarch | 1 tbsp |
| Cold water | 2 tbsp |
| Green onions, sliced | 4-5, plus more for topping |
| Sesame seeds | for topping |
| Cooked white rice | for serving |
Ground beef with a little fat, around 85% lean, gives you the best flavor and keeps the dish from drying out.
Tools You’ll Need
- Large skillet or wok
- Wooden spoon
- Small bowl (for the cornstarch slurry)
- Measuring cups and spoons
- Grater, for the ginger
Pro Tips
1. Brown the beef fully before adding the sauce. This step builds real flavor, so don’t rush past it even though it only takes a few minutes.
2. Drain excess fat before adding the sauce ingredients. Too much fat can make the finished sauce greasy instead of glossy.
3. Grate your ginger instead of mincing it. Grated ginger blends more evenly into the sauce and avoids any large, fibrous chunks.
4. Add the cornstarch slurry gradually while stirring. Pouring it all in at once can create clumps instead of a smooth, even thickening.
5. Add the green onions at the very end. Cooking them too long turns them soft and dull instead of keeping that bright color and fresh bite.
Substitutions and Variations
- Different protein: Ground turkey or ground chicken both work well in place of beef for a lighter version.
- Gluten-free: Use tamari or a gluten-free soy sauce alternative.
- Spicier version: Add a pinch of red pepper flakes or a drizzle of chili oil at the end.
- Extra vegetables: Stir in shredded carrots or steamed broccoli for a heartier, more colorful dish.
- Lower sugar: Reduce the brown sugar to 1/4 cup for a less sweet, more savory balance.
- Noodle version: Serve over lo mein noodles instead of rice for a different texture.
Make Ahead Tips
The sauce ingredients can be measured and mixed together up to 3 days ahead, stored in the fridge until you’re ready to cook.
This dish also reheats well, making it a solid option for meal prepping a few servings at once.
How to Make It
- Heat a large skillet over medium-high heat. Add the ground beef and cook, breaking it apart, for 6 to 7 minutes, until browned. Drain excess fat.
- Add the garlic and ginger, cooking for 30 seconds, until fragrant.
- Add the soy sauce, brown sugar, beef broth, and rice vinegar. Stir to combine.
- Bring to a simmer and cook for 3 to 4 minutes, until slightly reduced.
- In a small bowl, whisk the cornstarch and cold water together until smooth.
- Slowly stir the cornstarch slurry into the skillet, stirring constantly until the sauce thickens, about 1 to 2 minutes.
- Remove from heat and stir in the sliced green onions.
- Serve hot over rice, topped with extra green onions and sesame seeds.
Nutrition and Diet Notes
Here’s roughly what you’re working with per serving (recipe serves 4, not including rice):
- Calories: about 320
- Protein: about 22g
- Sugar: about 16g
For a lower sugar version, reduce the brown sugar to 1/4 cup, adjusting to taste as the sauce simmers.
What to Serve It With
- Steamed white or brown rice to soak up the sauce
- Steamed broccoli or snap peas on the side
- A simple cucumber salad for something cool and crisp
Leftovers and Storage
Store leftovers in an airtight container in the fridge for up to 4 days.
Reheat gently on the stovetop over low heat, or in the microwave in 30-second bursts, adding a splash of water if the sauce has thickened too much.
This dish freezes reasonably well. Store in a freezer-safe container for up to 2 months, and thaw overnight in the fridge before reheating.
FAQ
Is this dish very sweet?
It has a noticeable sweetness from the brown sugar, balanced by the savory soy sauce, similar to the classic restaurant version. You can reduce the sugar if you’d prefer it more savory.
Can I use a different sweetener instead of brown sugar?
Yes, honey or maple syrup can work in a pinch, though the flavor will be slightly different from the classic version.
Why is my sauce too thin?
This usually means the cornstarch slurry needs a little more time to cook, or a touch more slurry is needed. Let it simmer a bit longer, stirring constantly.
Can I make this dish spicy?
Yes, add red pepper flakes or a splash of chili oil at the end for some heat.
Can I double this recipe?
Yes, just use a larger skillet so the beef browns properly instead of steaming from overcrowding.
Wrapping Up
This recipe proved that you don’t need a deep fryer or a long ingredient list to get that classic Mongolian beef flavor at home.
It’s fast, familiar, and exactly the kind of dinner that makes takeout feel a little unnecessary.
If you make this, come back and tell me if you served it over rice or noodles, or if you added extra vegetables. 🍚
I’d love to hear how yours turned out.