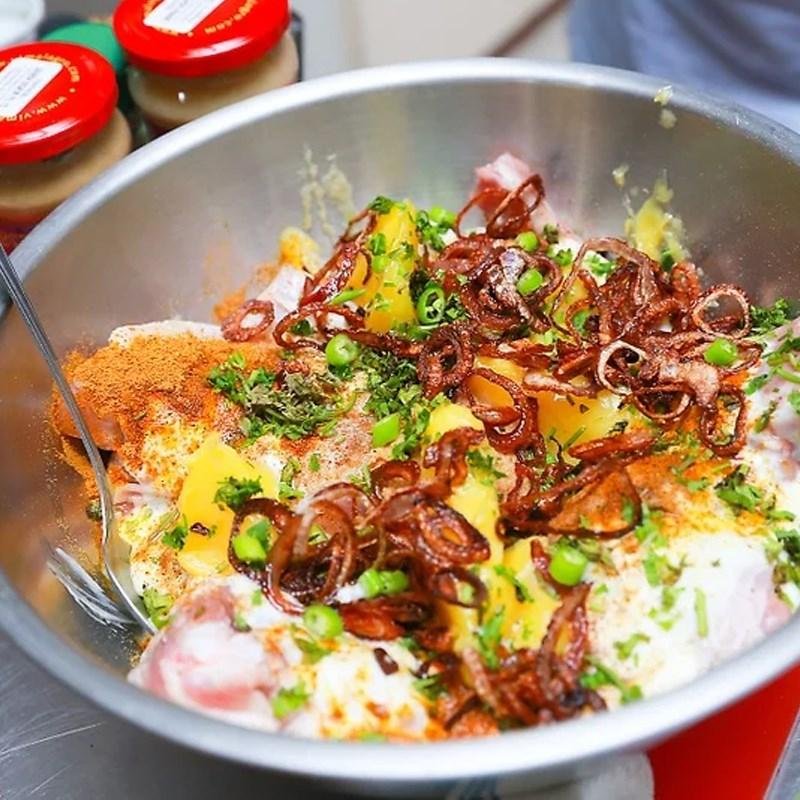
The first time I made biryani from scratch, I finally understood why people talk about it like it’s a whole event. 🍚
Layers of fragrant rice, spiced chicken, and golden fried onions all steamed together until every grain of rice smells incredible.
It takes a bit more time than your average weeknight dinner, but it’s genuinely one of the most rewarding dishes you can make at home.
Once you make this from scratch, you’ll understand why biryani has such a devoted following.
Why This Recipe Works
Marinating the chicken in yogurt and spices tenderizes it while packing in flavor from the very start.
Parboiling the rice separately, instead of cooking it directly with the chicken, keeps every grain fluffy instead of mushy.
And the final steaming step, called dum, is what lets all those layered flavors meld together into one cohesive dish.
What You’ll Need
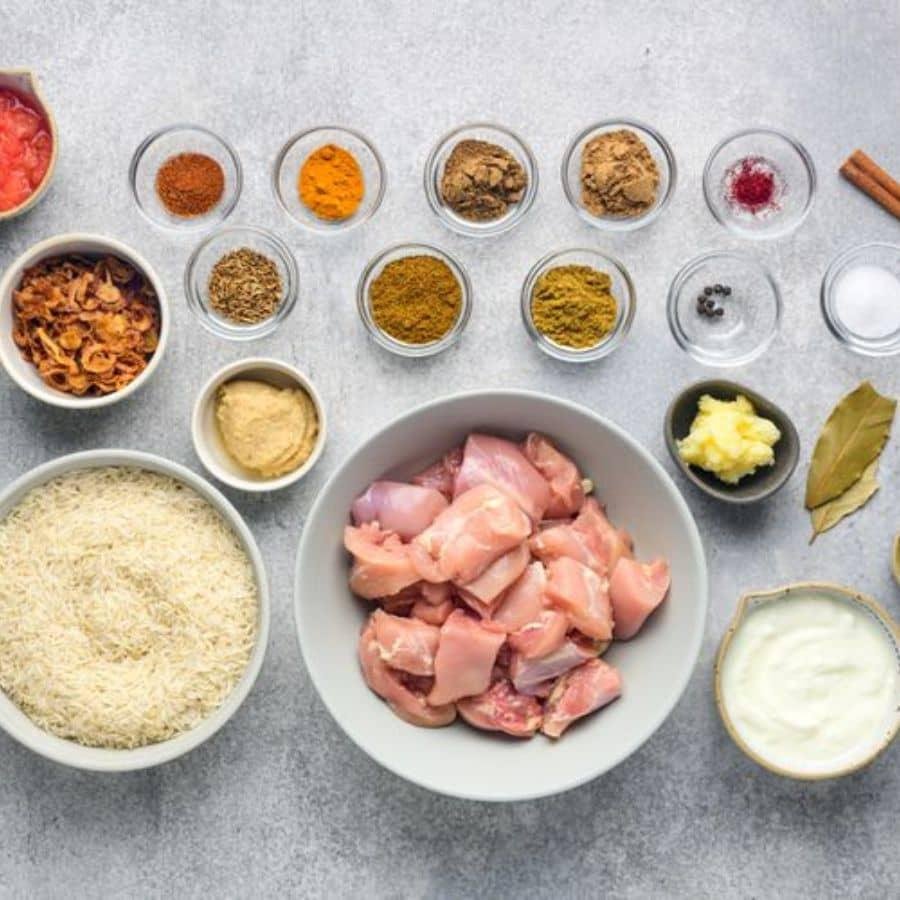
| Ingredient | Amount |
|---|---|
| Boneless, skinless chicken thighs, cut into pieces | 2 lbs |
| Plain yogurt | 1/2 cup |
| Ginger garlic paste | 1 tbsp |
| Red chili powder | 1 tsp |
| Ground turmeric | 1/2 tsp |
| Garam masala | 1 tsp |
| Basmati rice | 2 cups |
| Whole spices (bay leaf, cinnamon stick, cardamom pods) | A small handful |
| Yellow onions, thinly sliced | 2 large |
| Vegetable oil or ghee | 1/4 cup |
| Fresh mint and cilantro, chopped | 1/2 cup total |
| Saffron strands soaked in warm milk | A pinch, in 2 tbsp milk |
| Salt | To taste |
A slightly longer list, but each ingredient earns its place in this dish.
Tools You’ll Need
- Large heavy bottomed pot with a tight fitting lid
- Separate pot for parboiling rice
- Large skillet for frying onions
- Mixing bowl
- Foil, optional, for sealing the pot
Pro Tips
Things that make a real difference for a first time biryani maker.
- Fry the onions until deeply golden, almost caramelized. They add a ton of flavor and are also used as a garnish.
- Don’t skip the yogurt marinade time. At least an hour makes a noticeable difference, overnight is even better.
- Parboil the rice until it’s about 70 percent cooked. It will finish cooking during the steaming step.
- Seal the pot tightly during the dum step. A tight seal, using foil under the lid if needed, keeps the steam in where it belongs.
- Let the biryani rest for 10 minutes after cooking before opening the lid. This helps everything settle into place.
Substitutions and Variations
| Original | Swap | Notes |
|---|---|---|
| Chicken thighs | Bone in chicken pieces | More traditional, adds extra flavor |
| Basmati rice | Long grain white rice | Slightly different texture, still works |
| Ghee | Vegetable oil | Lighter option, less rich flavor |
| Fresh saffron milk | Skip it | Still flavorful, just less golden color |
| Regular version | Add potatoes | A common addition in many biryani recipes |
Want it spicier? Increase the red chili powder or add sliced green chilies to the marinade.
Make Ahead Tips
The chicken can be marinated up to 24 hours ahead, which actually improves the flavor.
Fried onions can be made a day or two in advance and stored in an airtight container at room temperature.
This dish is best assembled and steamed close to serving time, since the layering and dum process is really the final step.
How to Make Chicken Biryani

- In a bowl, combine the chicken with yogurt, ginger garlic paste, red chili powder, turmeric, and garam masala. Marinate for at least 1 hour, or up to overnight.
- Rinse the basmati rice until the water runs clear, then soak for 20 minutes.
- Bring a pot of water to a boil with the whole spices and a good pinch of salt. Parboil the rice until about 70 percent cooked, then drain.
- Heat oil or ghee in a skillet and fry the sliced onions until deeply golden. Set aside, reserving some oil.
- In the same pot used for the onions, cook the marinated chicken over medium heat until mostly cooked through, about 10-12 minutes.
- Layer half the rice over the chicken, followed by half the fried onions, mint, and cilantro.
- Add the remaining rice, then top with the rest of the onions, mint, and cilantro.
- Drizzle the saffron milk evenly over the top layer.
- Cover tightly with a lid, sealing with foil underneath if needed.
- Cook on low heat for 25-30 minutes, then remove from heat and let rest for 10 minutes before opening.
- Gently fluff and mix the layers together before serving.
That final rest really matters, so try not to rush it.
Extra Details
A serving of chicken biryani comes in around 480 calories, depending on portion size and how much oil or ghee is used.
This pairs really well with raita, a simple yogurt based side, and a fresh salad.
To save time, marinate the chicken and fry the onions the night before so all that’s left is cooking and layering.
Leftovers and Storage
Store leftovers in an airtight container in the fridge for up to 3 days.
Reheat gently in a covered pan over low heat with a splash of water, or in the microwave with a damp paper towel over the top to keep the rice from drying out.
This dish also freezes reasonably well, just thaw overnight in the fridge before reheating.
FAQ
Can I use chicken breast instead of thighs? You can, but thighs are recommended since they stay more tender through the longer cooking process.
Do I really need to fry the onions separately? Yes, this step is what gives biryani a lot of its signature flavor, so it’s worth the extra few minutes.
What is the dum method? It’s the final slow steaming step, cooked with a tightly sealed lid, that allows the layered flavors to fully combine.
Can I make this in a rice cooker or instant pot? Yes, though the method changes slightly, many instant pot biryani methods use the sauté and pressure cook functions instead of stovetop steaming.
Why is my rice mushy? This usually means the rice was parboiled too long before layering. It should still have a bite before the final steaming step.
Wrapping Up
Chicken biryani takes a bit more time than most weeknight meals, but every step adds something that makes the final dish worth it.
Between the fragrant spices, fried onions, and that final steam, this is the kind of recipe that turns into a real occasion.
Give this one a try when you have a little extra time and let me know in the comments how it turned out. I always love hearing what sides people serve alongside it.